DIY Faux Brick Accent Wall
DIY YOU-nique Accent Wall Using Faux Brick Panels

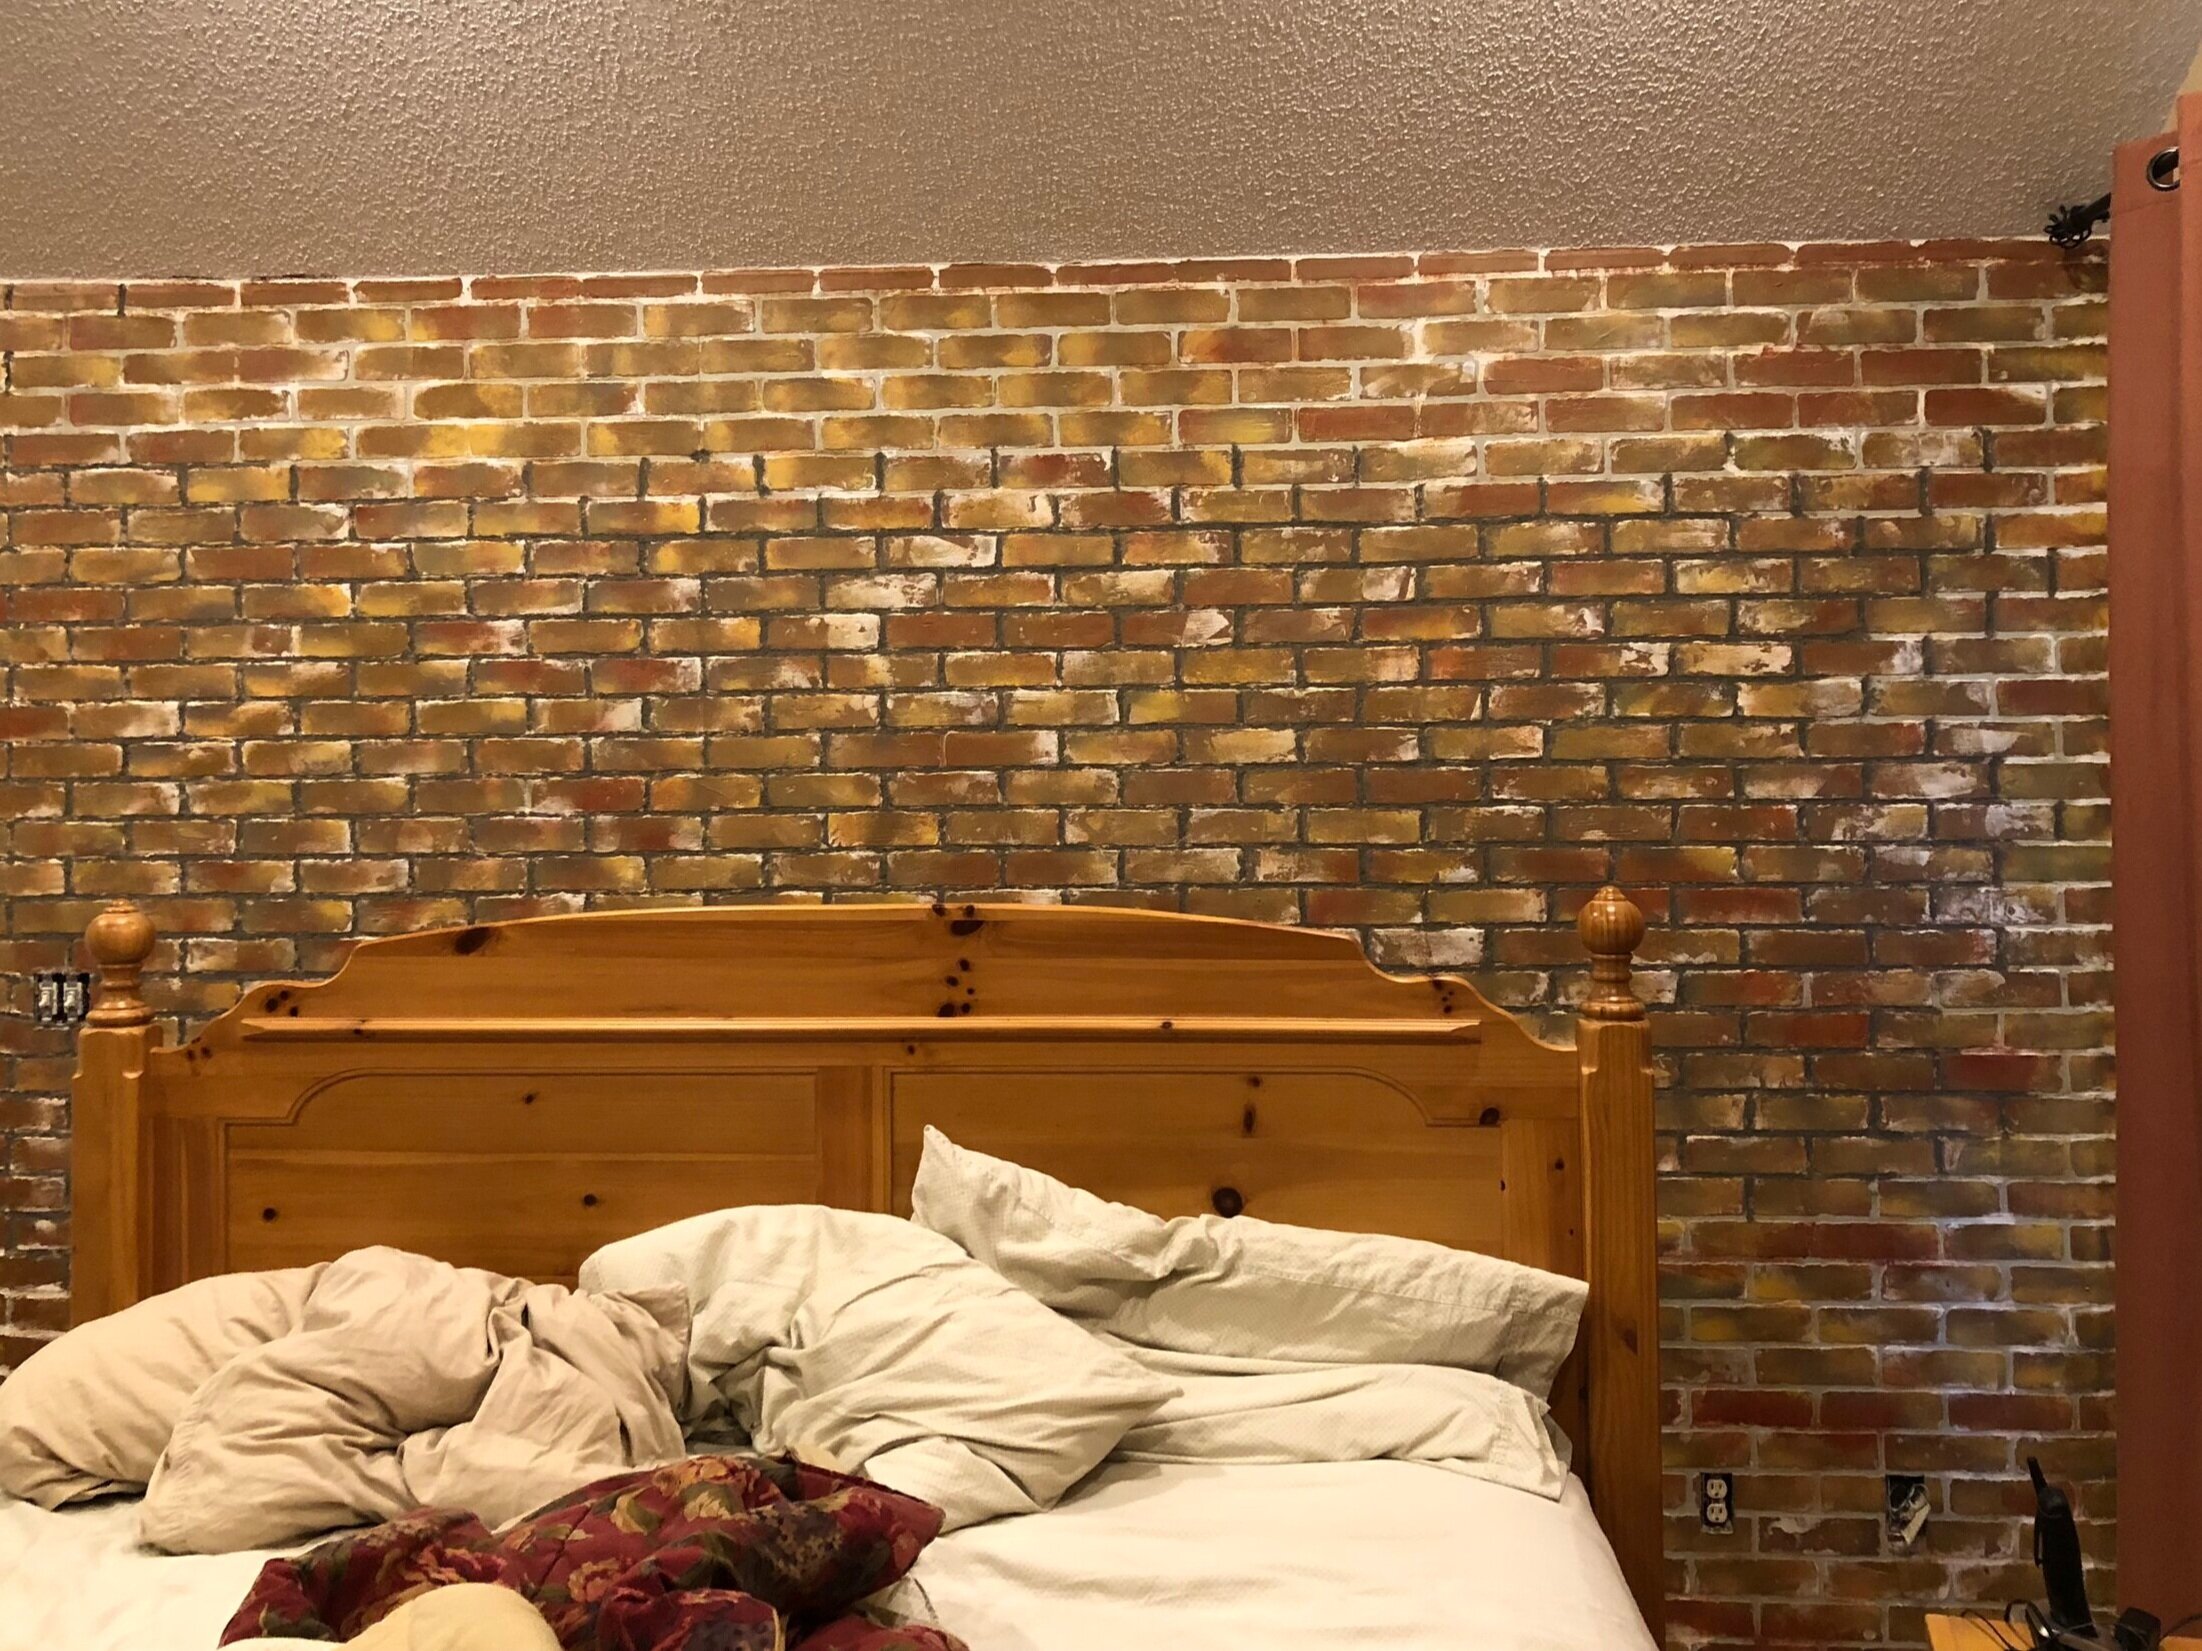
A friend of mine created a faux brick wall in her bedroom and I fell in love with it and decided it was a must-have for my own bedroom. After searching Pinterest and watching the limited YouTube tutorial videos available, I sort of “merged” some techniques to come up with an aged brick look.
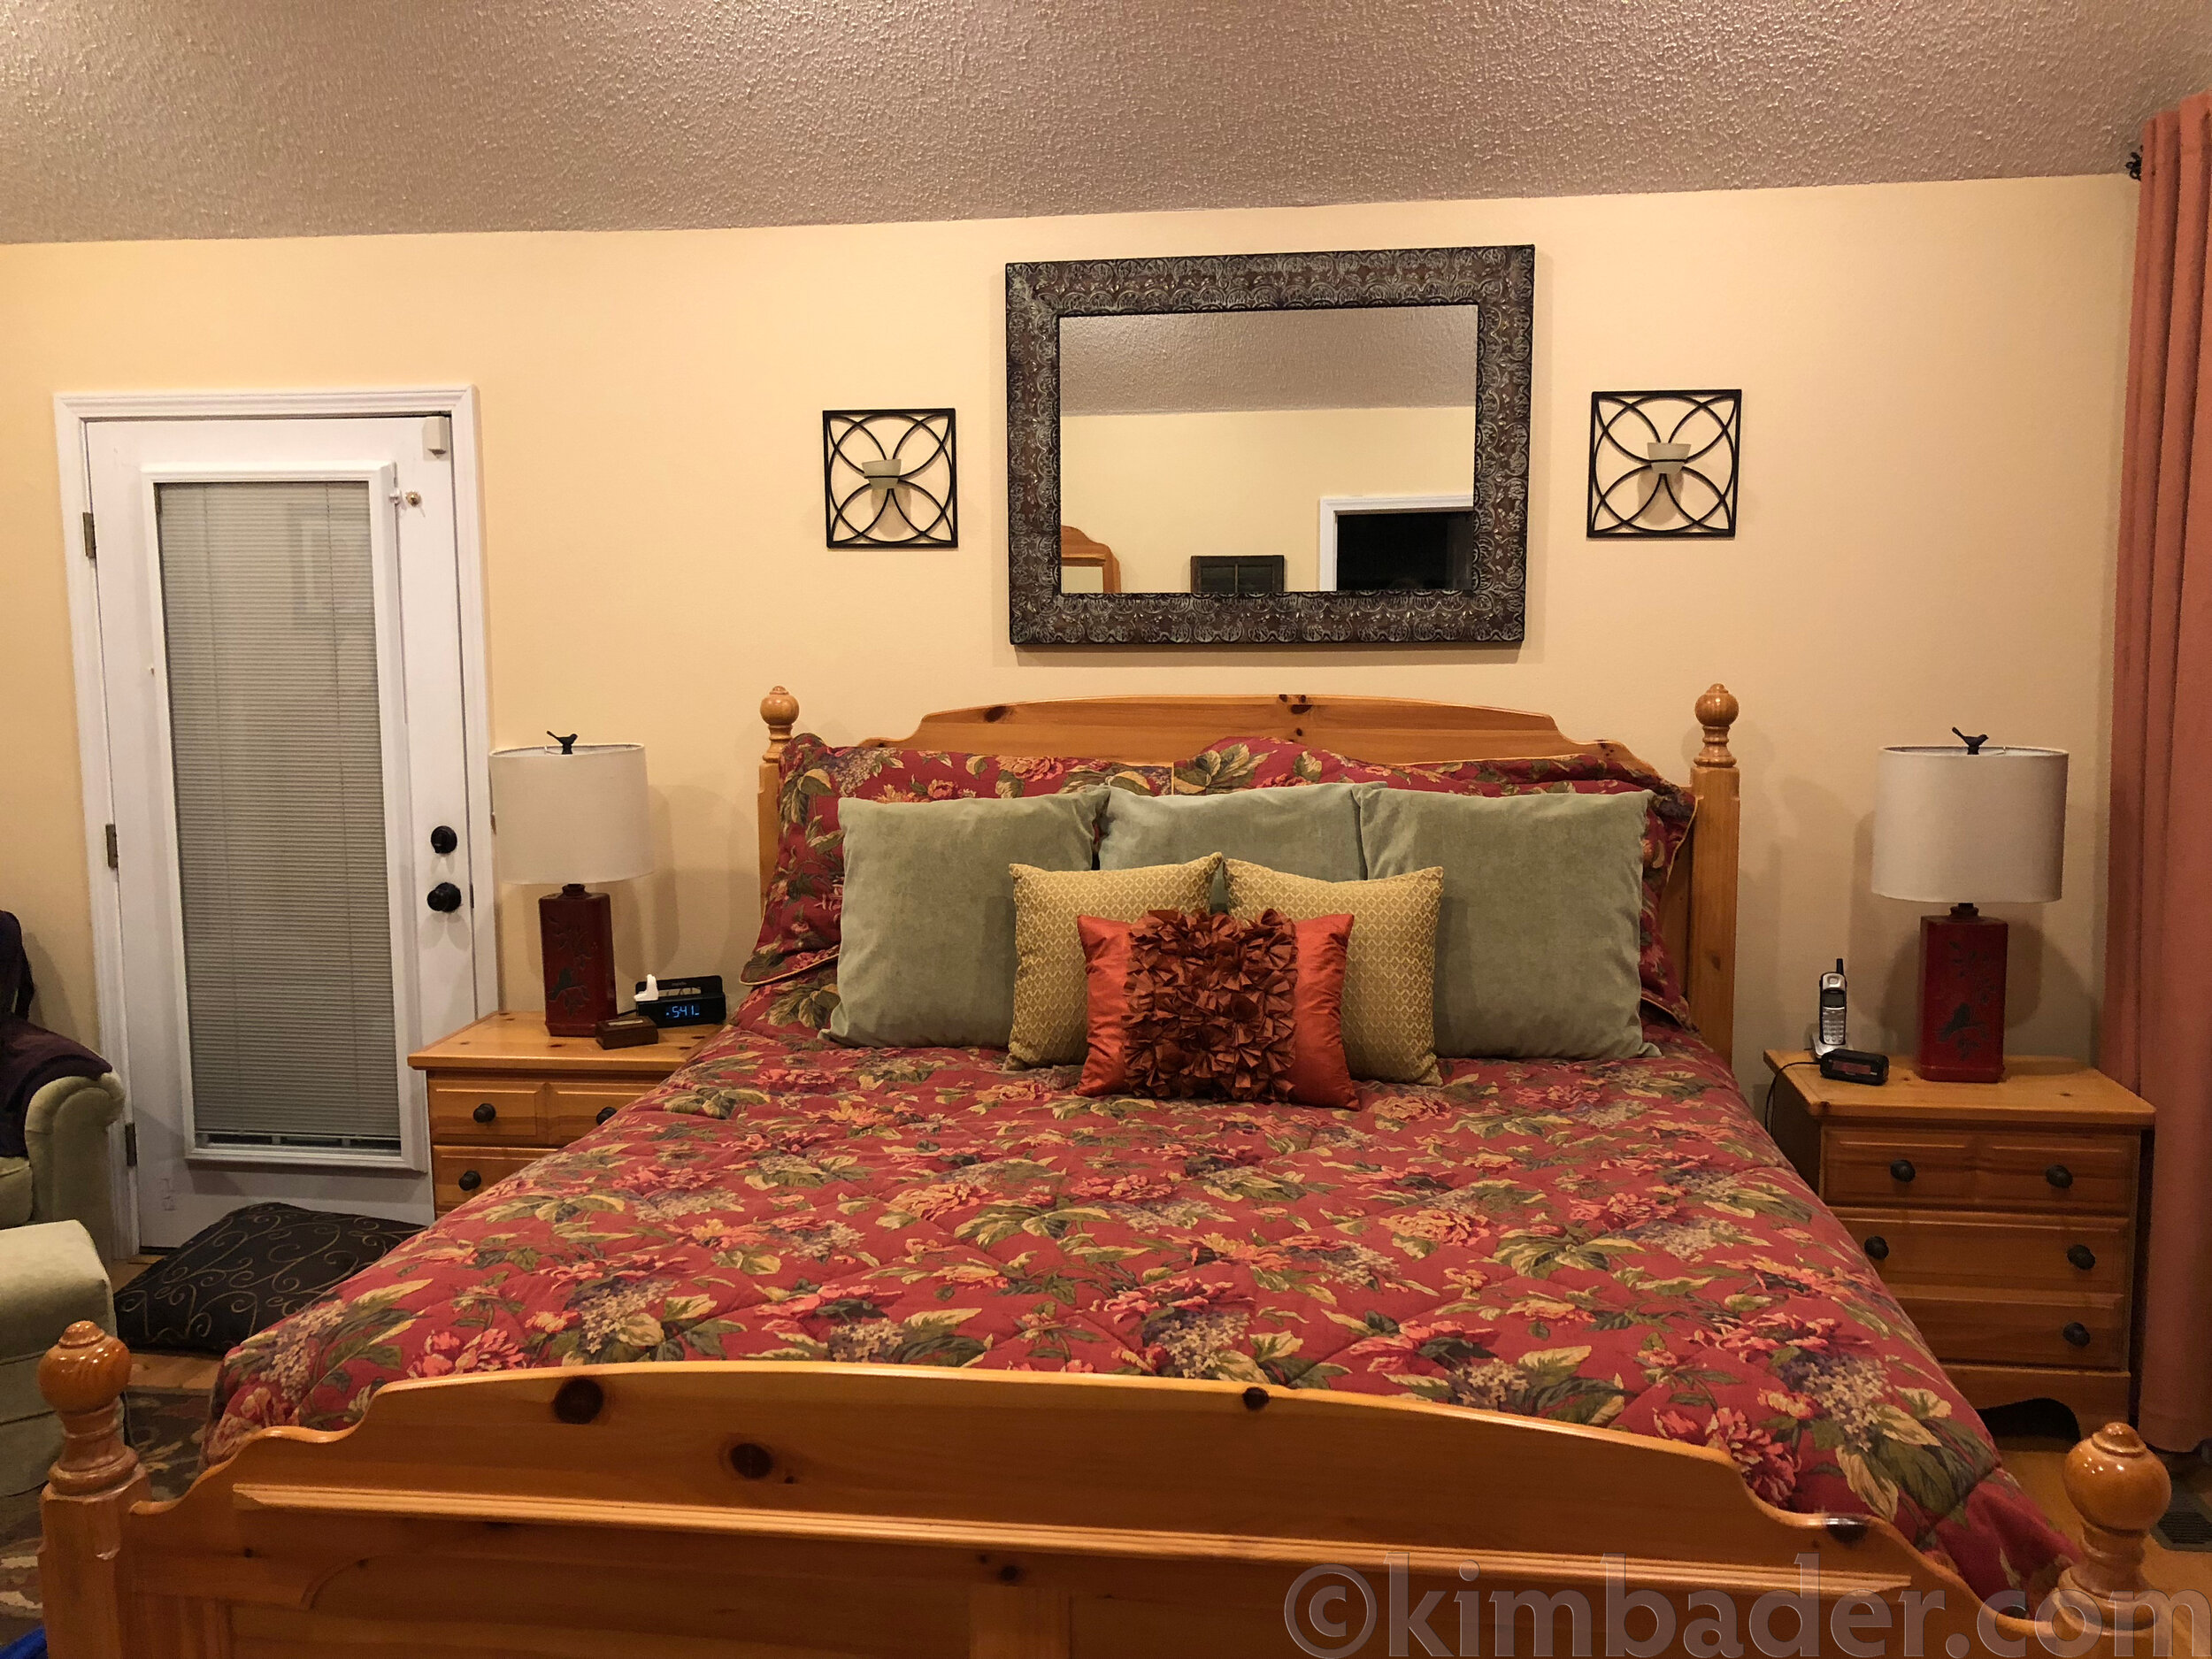
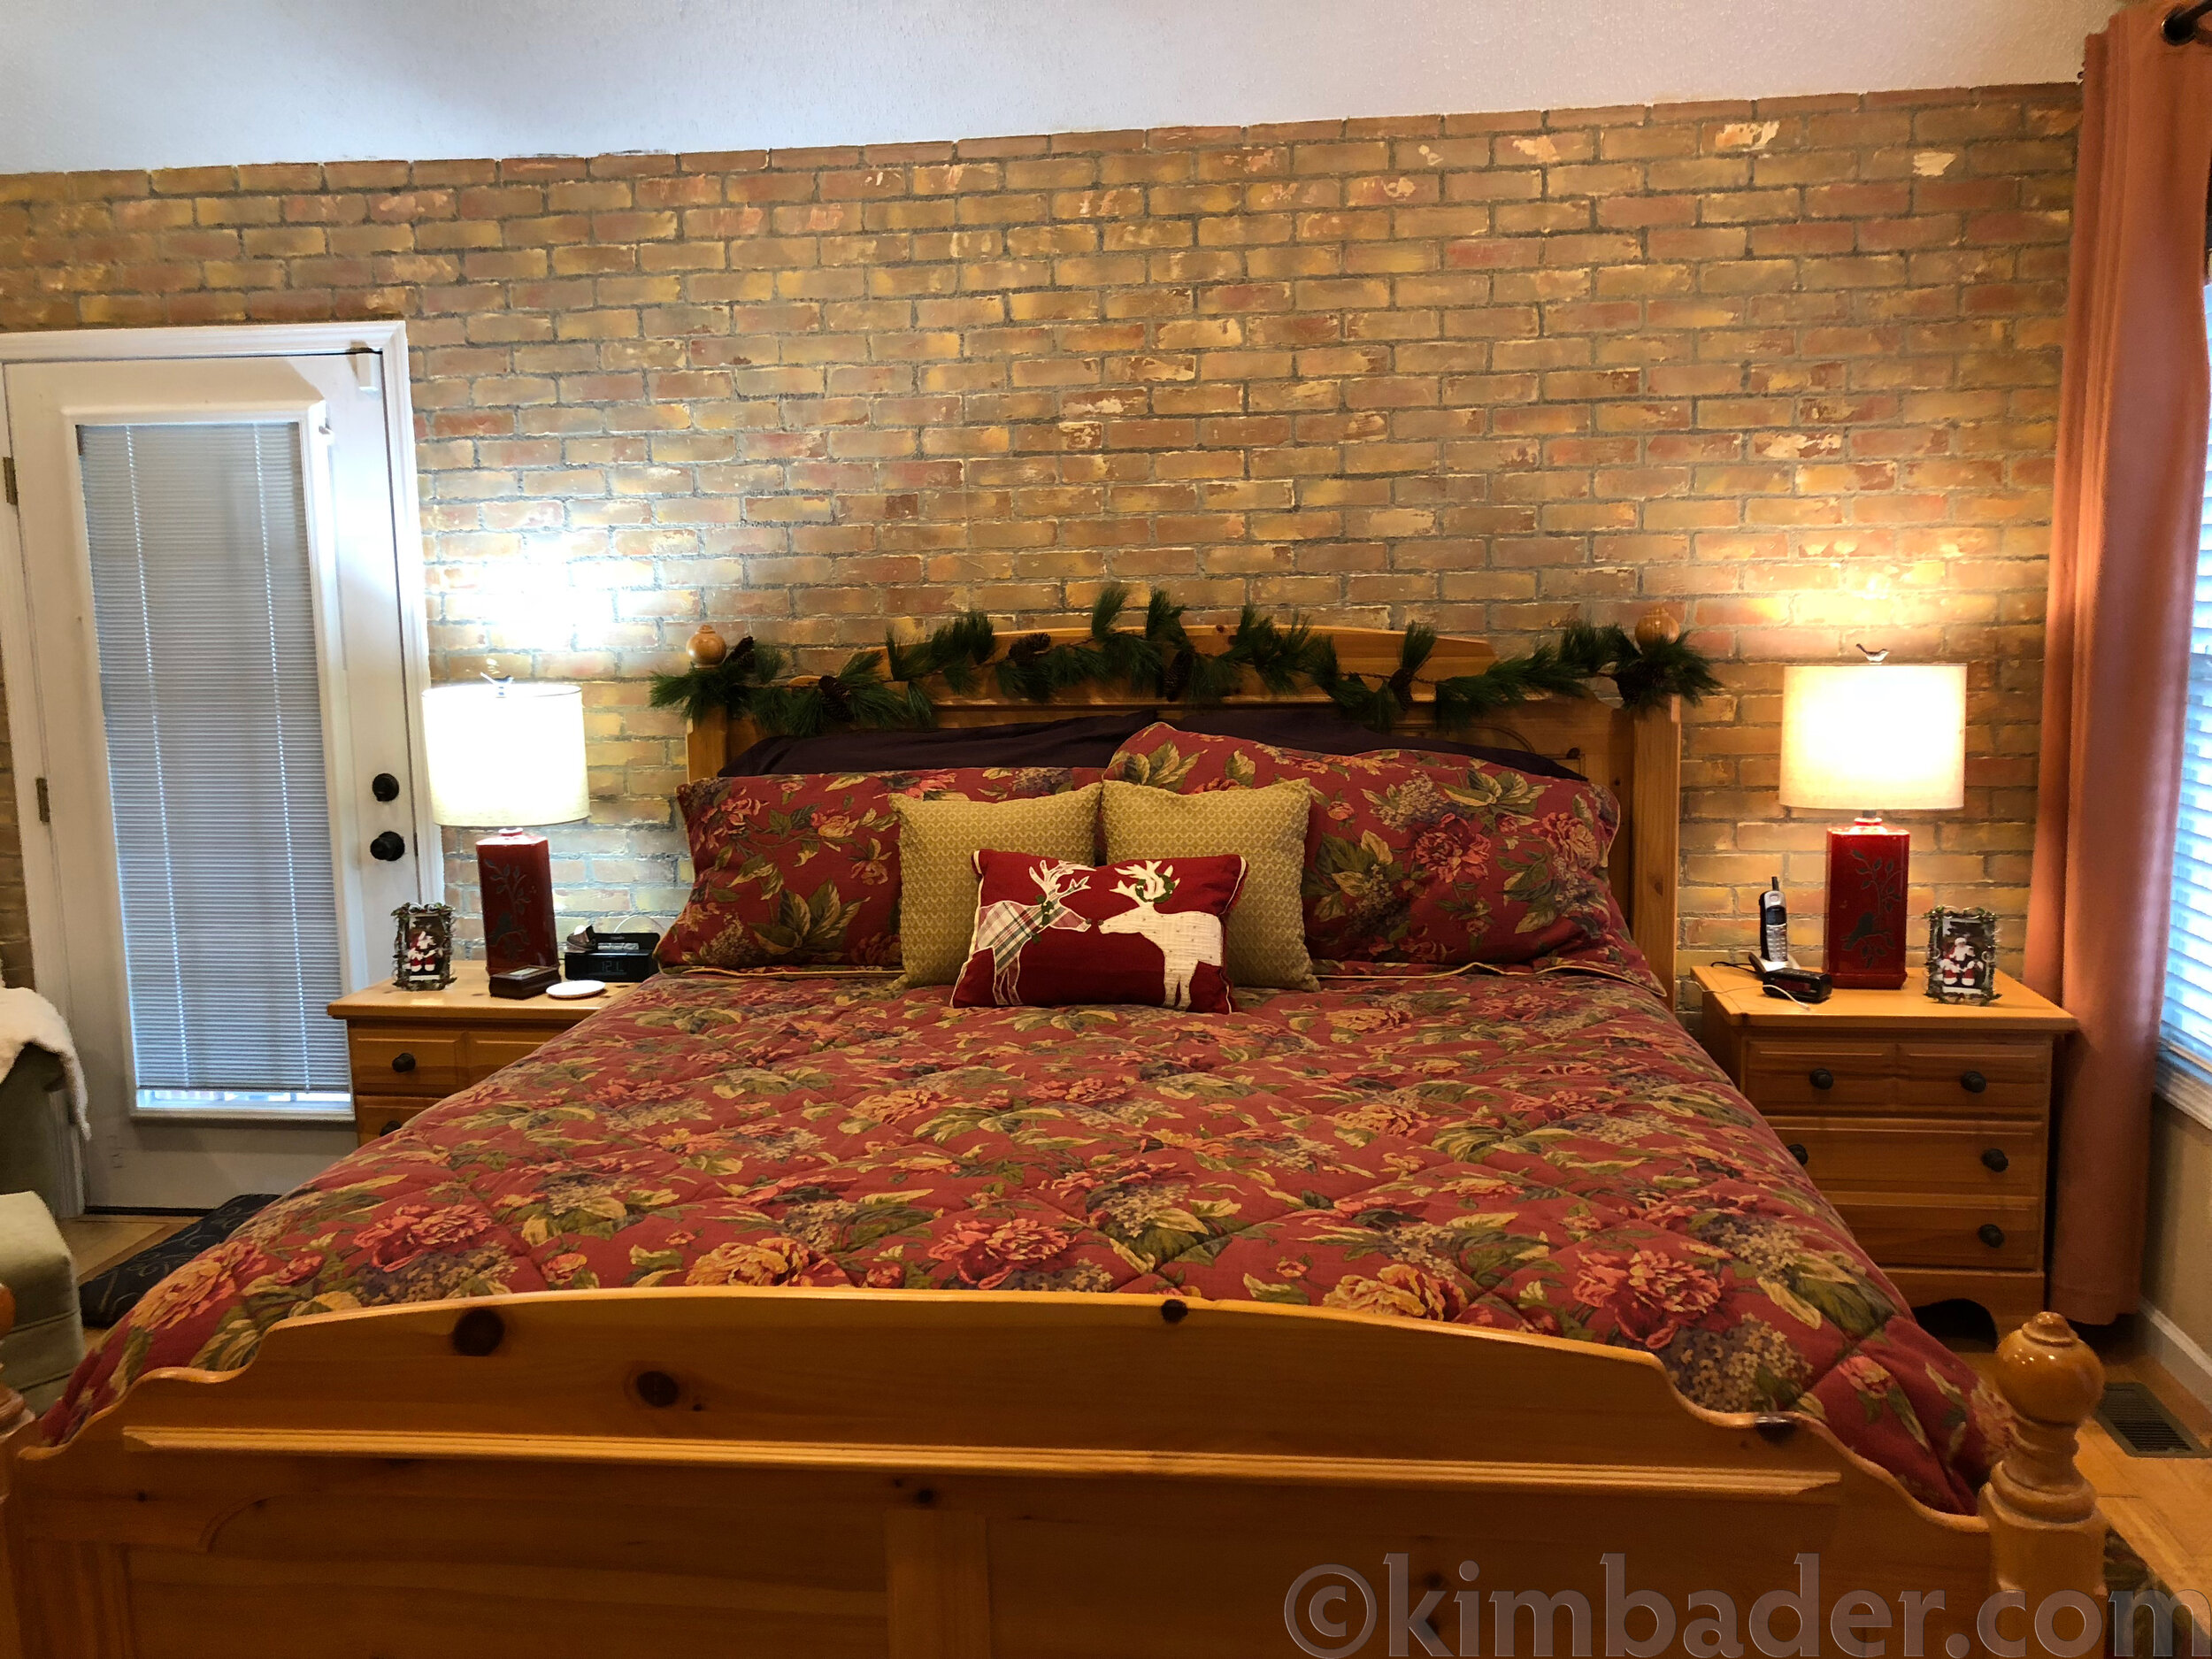
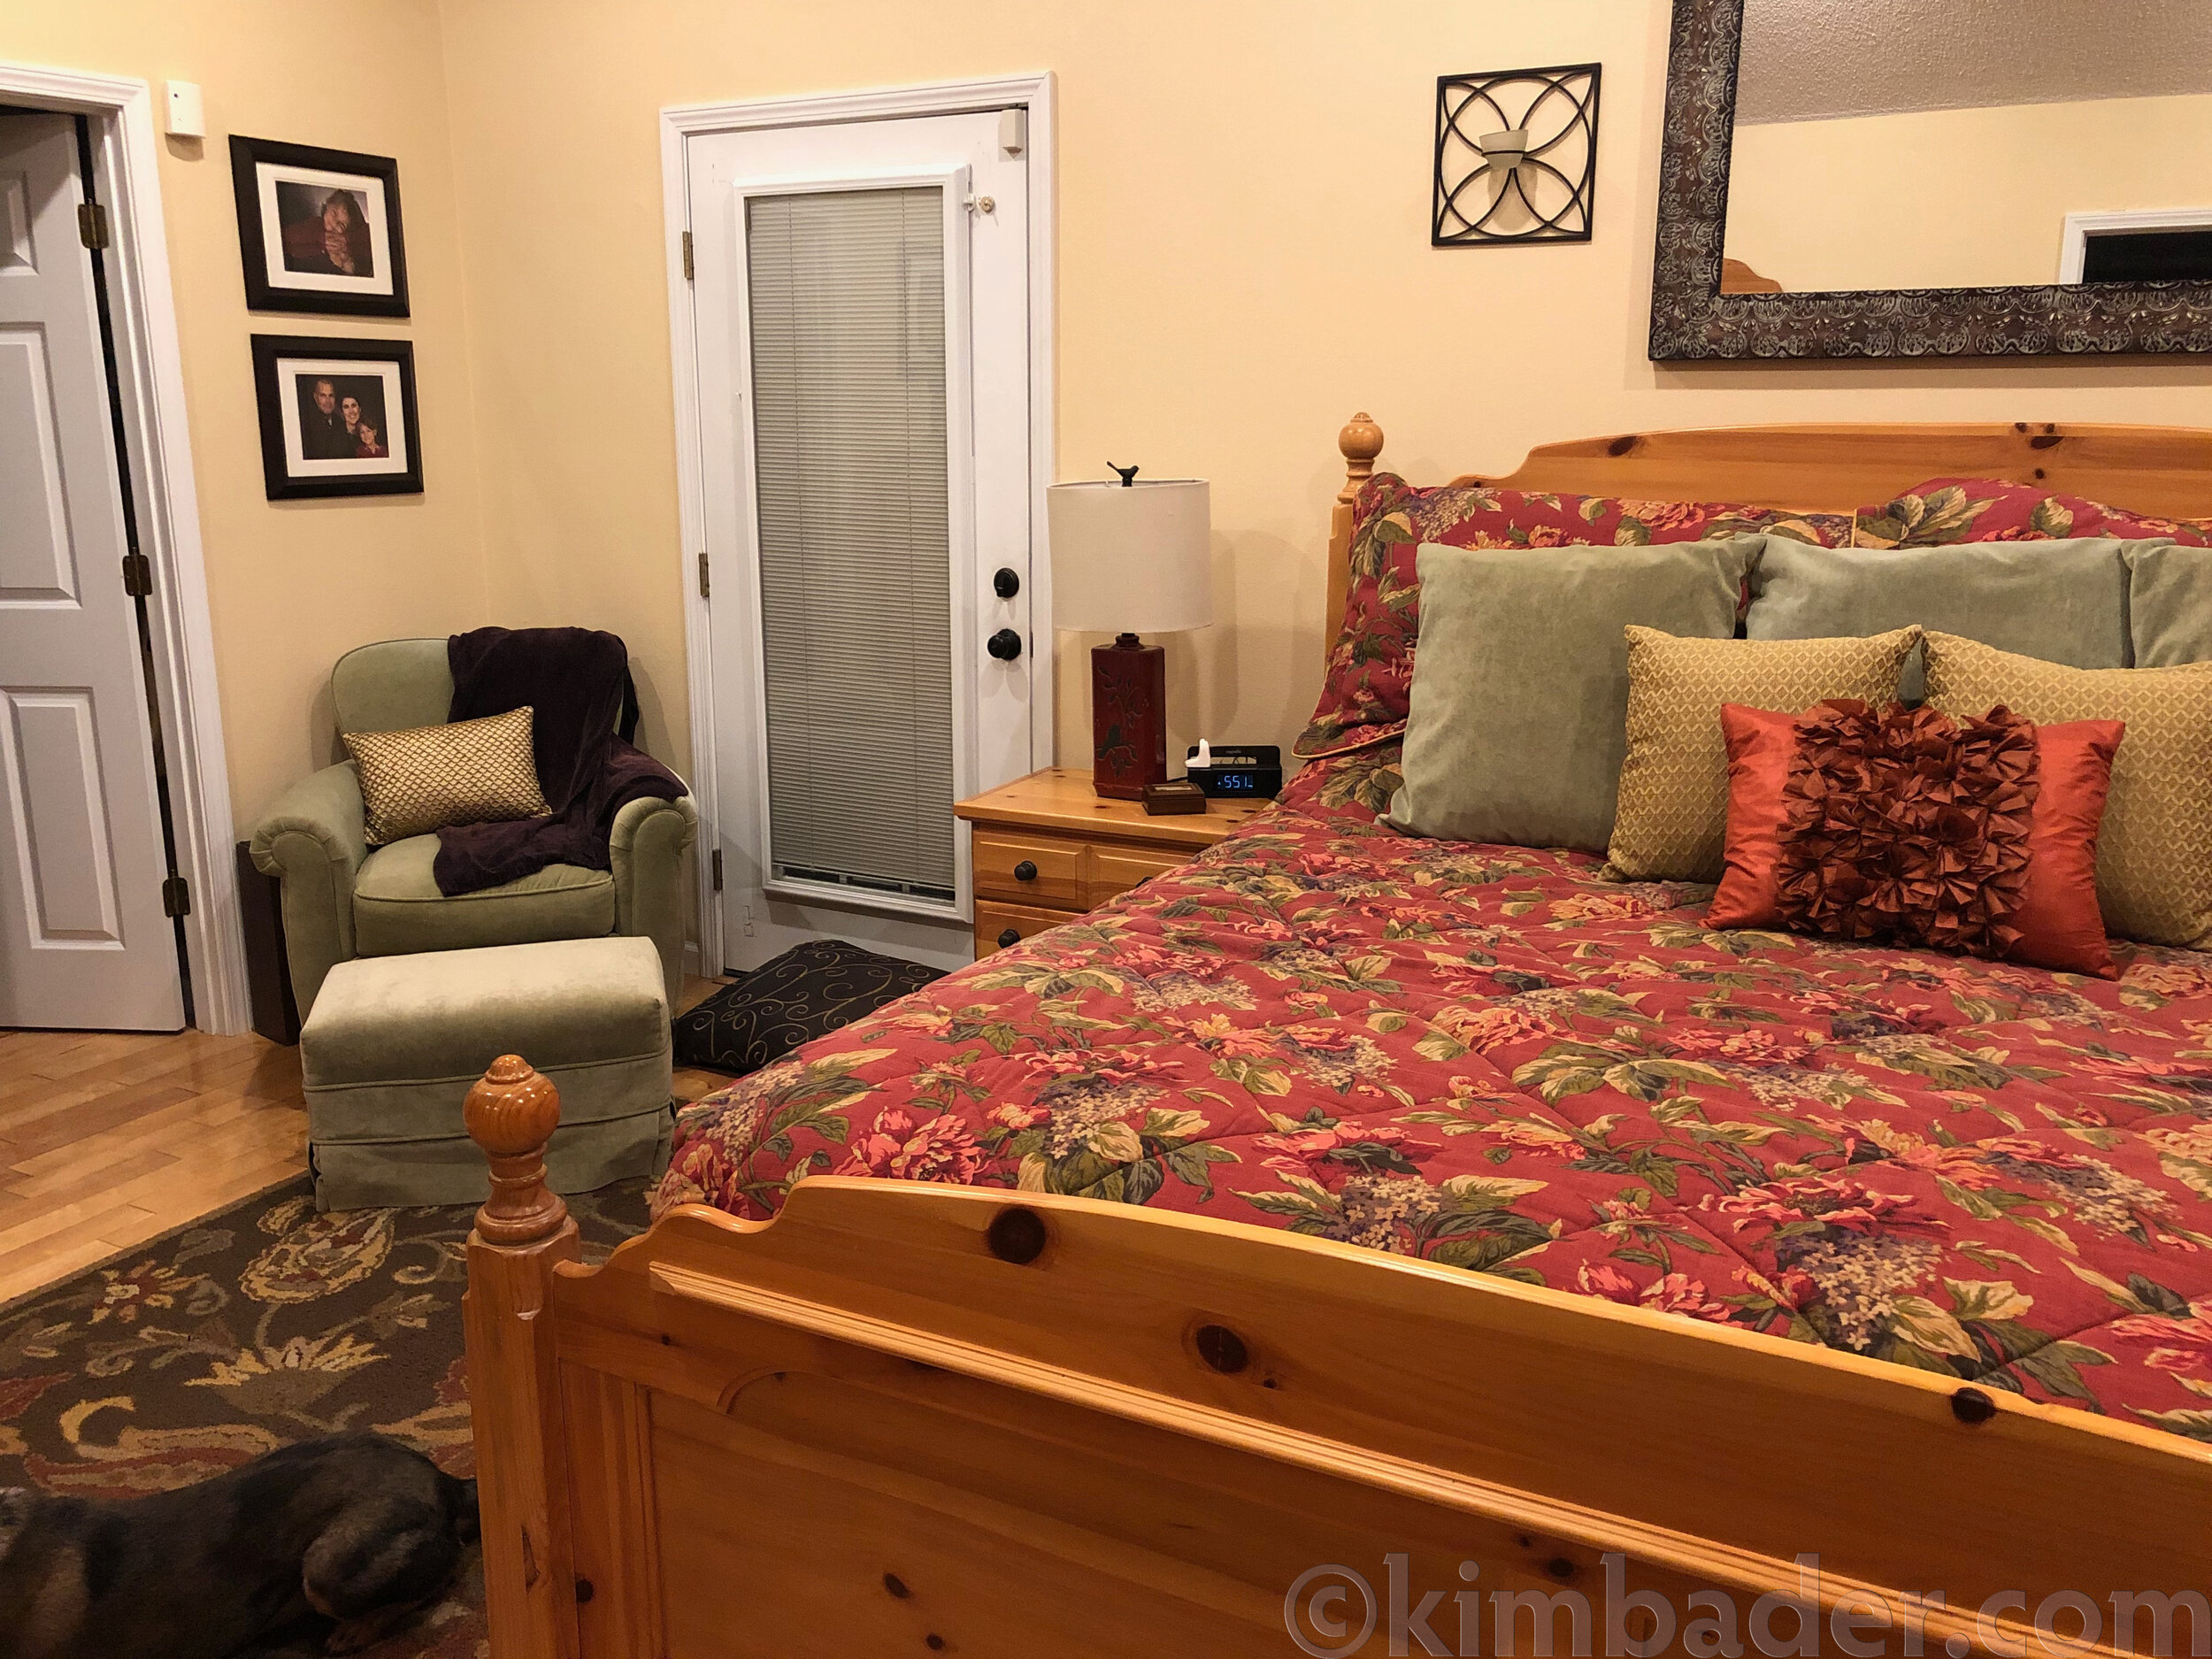
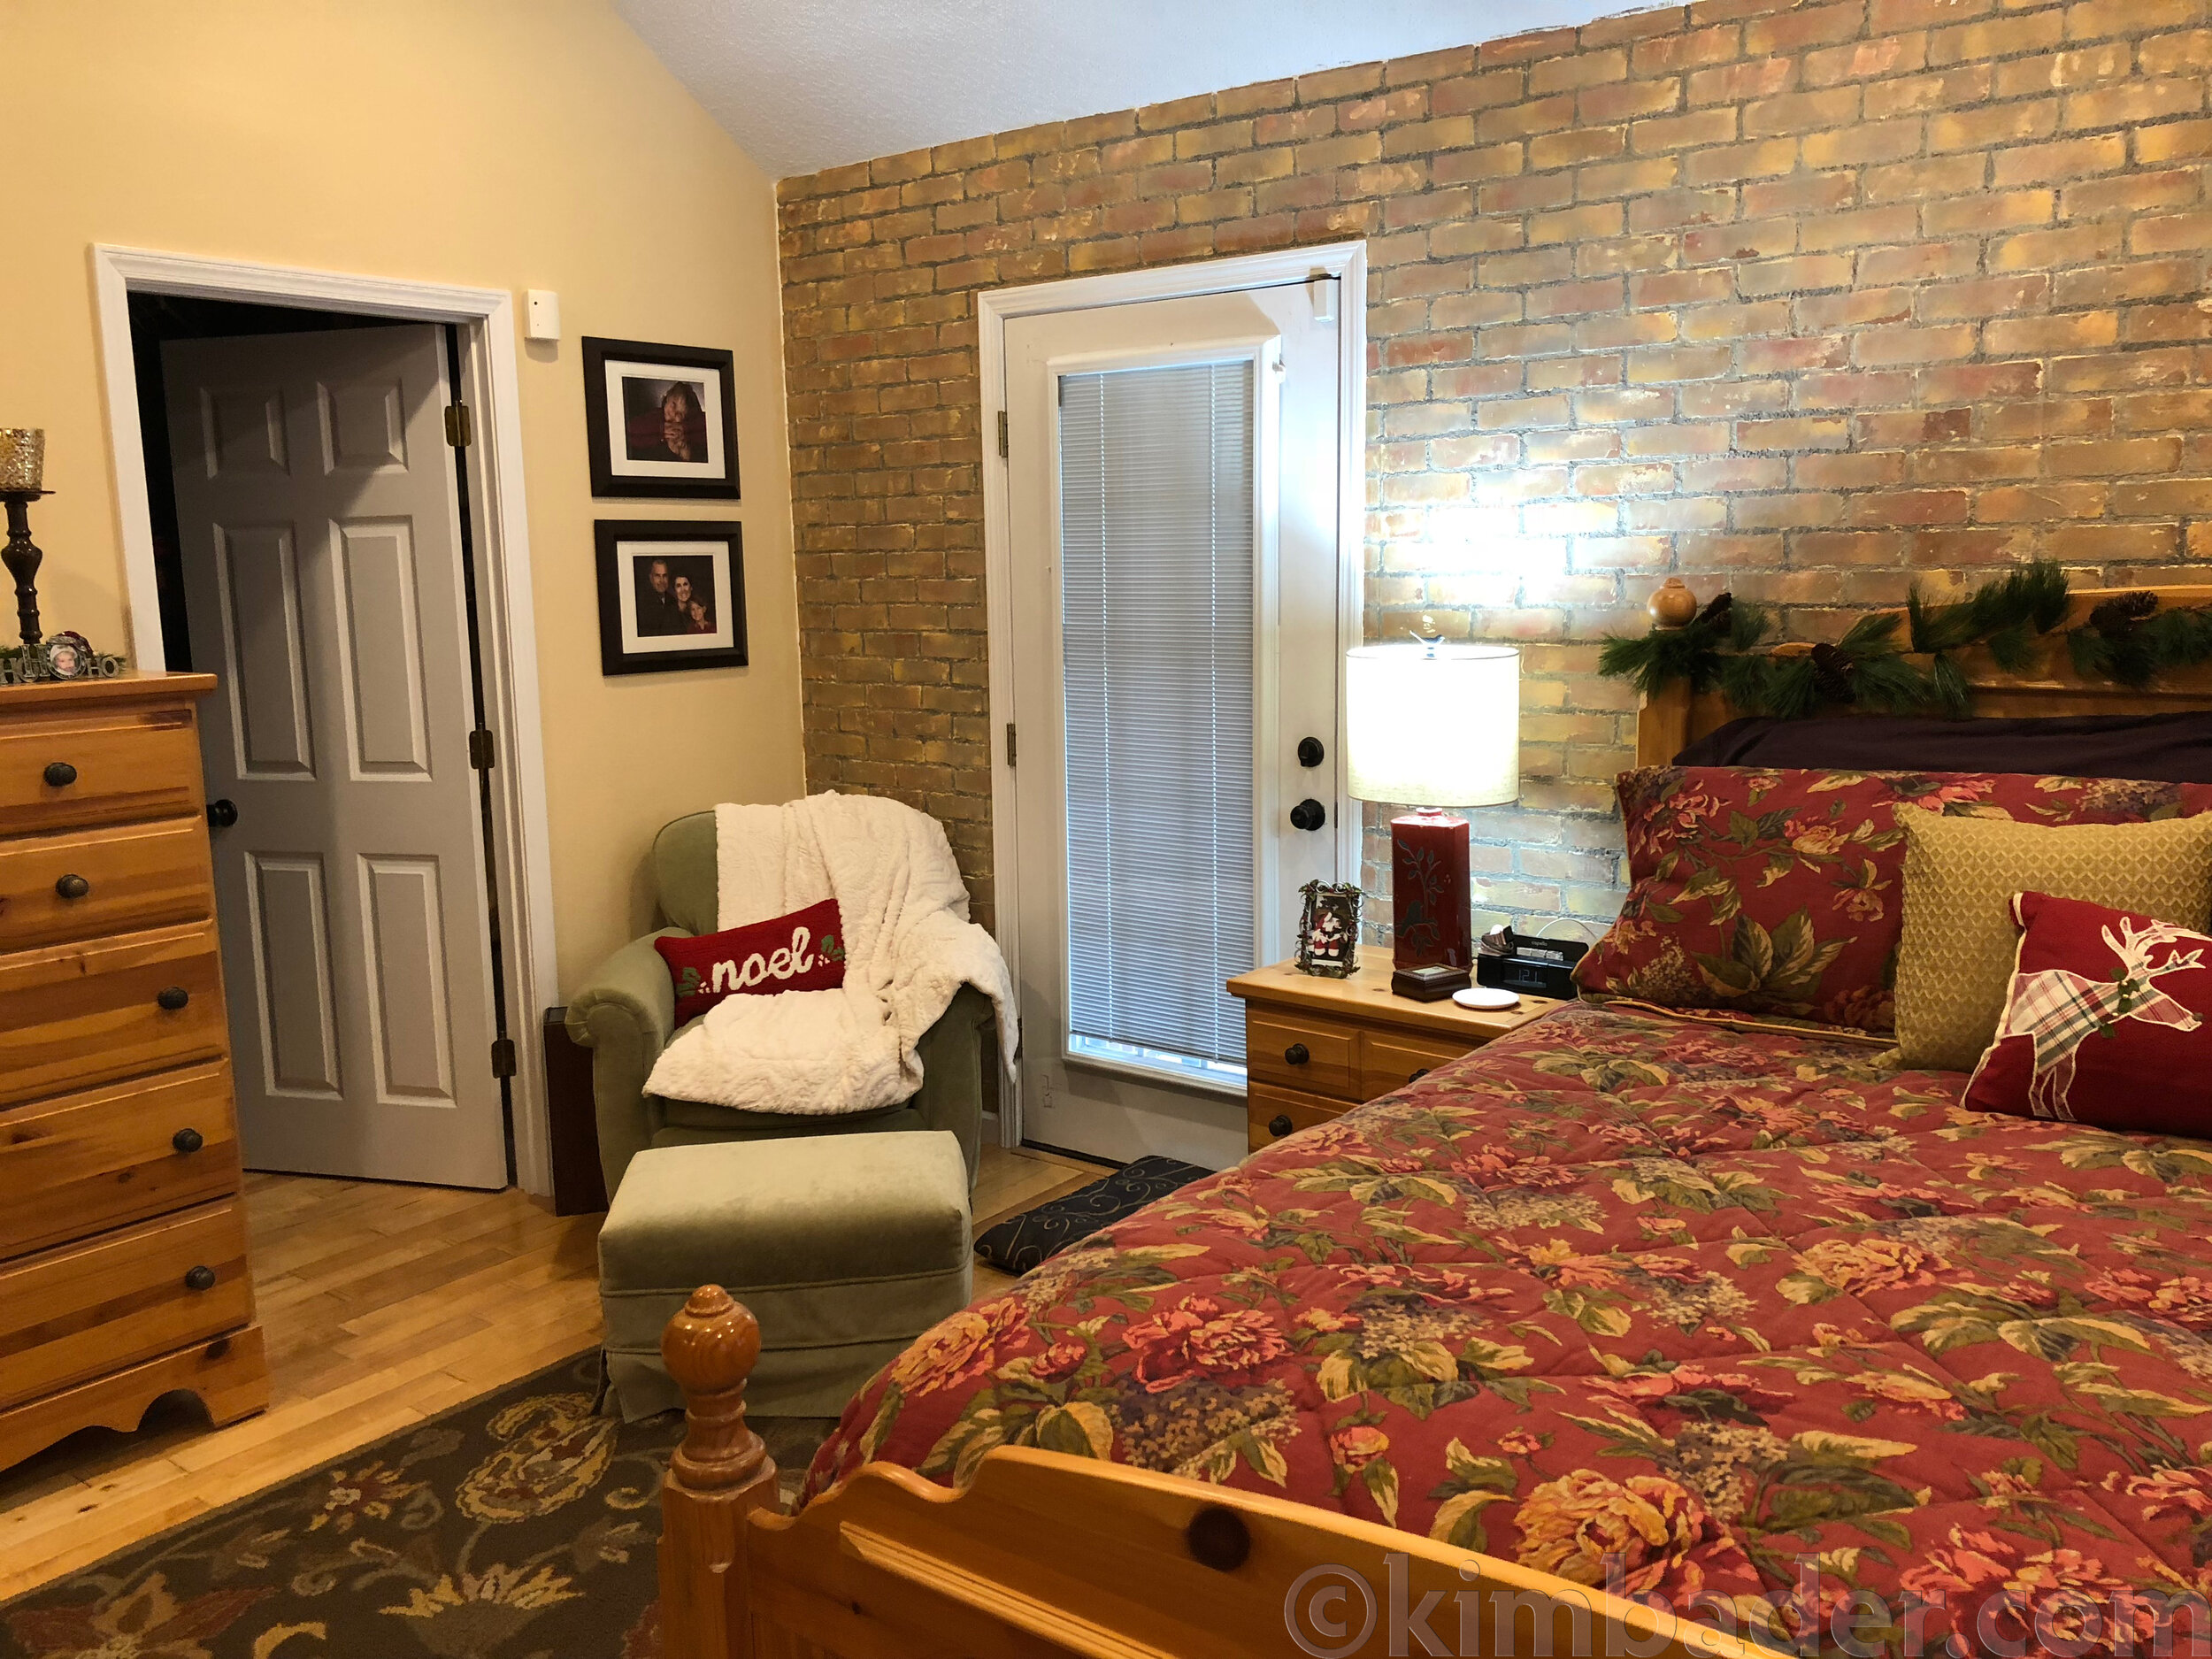
After two years, I’m still not tired of it! Looking at these before and afters my bedroom looks so bare without the accent wall. It just makes it so cozy!
Faux brick panels (I wanted ones without black “mortar” so I had to special order them from Menards)
“Scraps” of paint from past walls painted
Screws and a drill or a strong adhesive such as Liquid Nails
Putty knife; about 3” wide (I prefer flexible; aka palette knife or joint knife)
These are the perfect size when you cut them in half to “stamp” the bricks.
Saw horses (these are similar to what we have)
White paint, water, and a small bucket
Concrete mortar in a caulk tube, caulk gun, and rubber dish gloves; I got the caulk from Lowes but I’m not sure which specific one. I found something similar on Amazon but Lowes is much cheaper. (Optional: this is the special touch that makes it look more real and dimensional)
Circular saw or oscillating tool to cut the panels.
One patient husband, wife, or handy person (couldn’t find this on Amazon…)
Although my friend achieved hers with her mom, my walls were horribly uneven and I had a door to go around which required a little handyman help. If you don’t have one of these, see Other Options at the bottom of this post.
#1

STEP 1: We didn’t start in the corner. We started with the full 16” second panel, then measured and cut the corner panel.

STEP 1: We cut the 4’ panels to 16'‘ wide giving us 3 panels per 4’ panel. An adhesive, such as liquid nails, is also an option for attaching the panels.
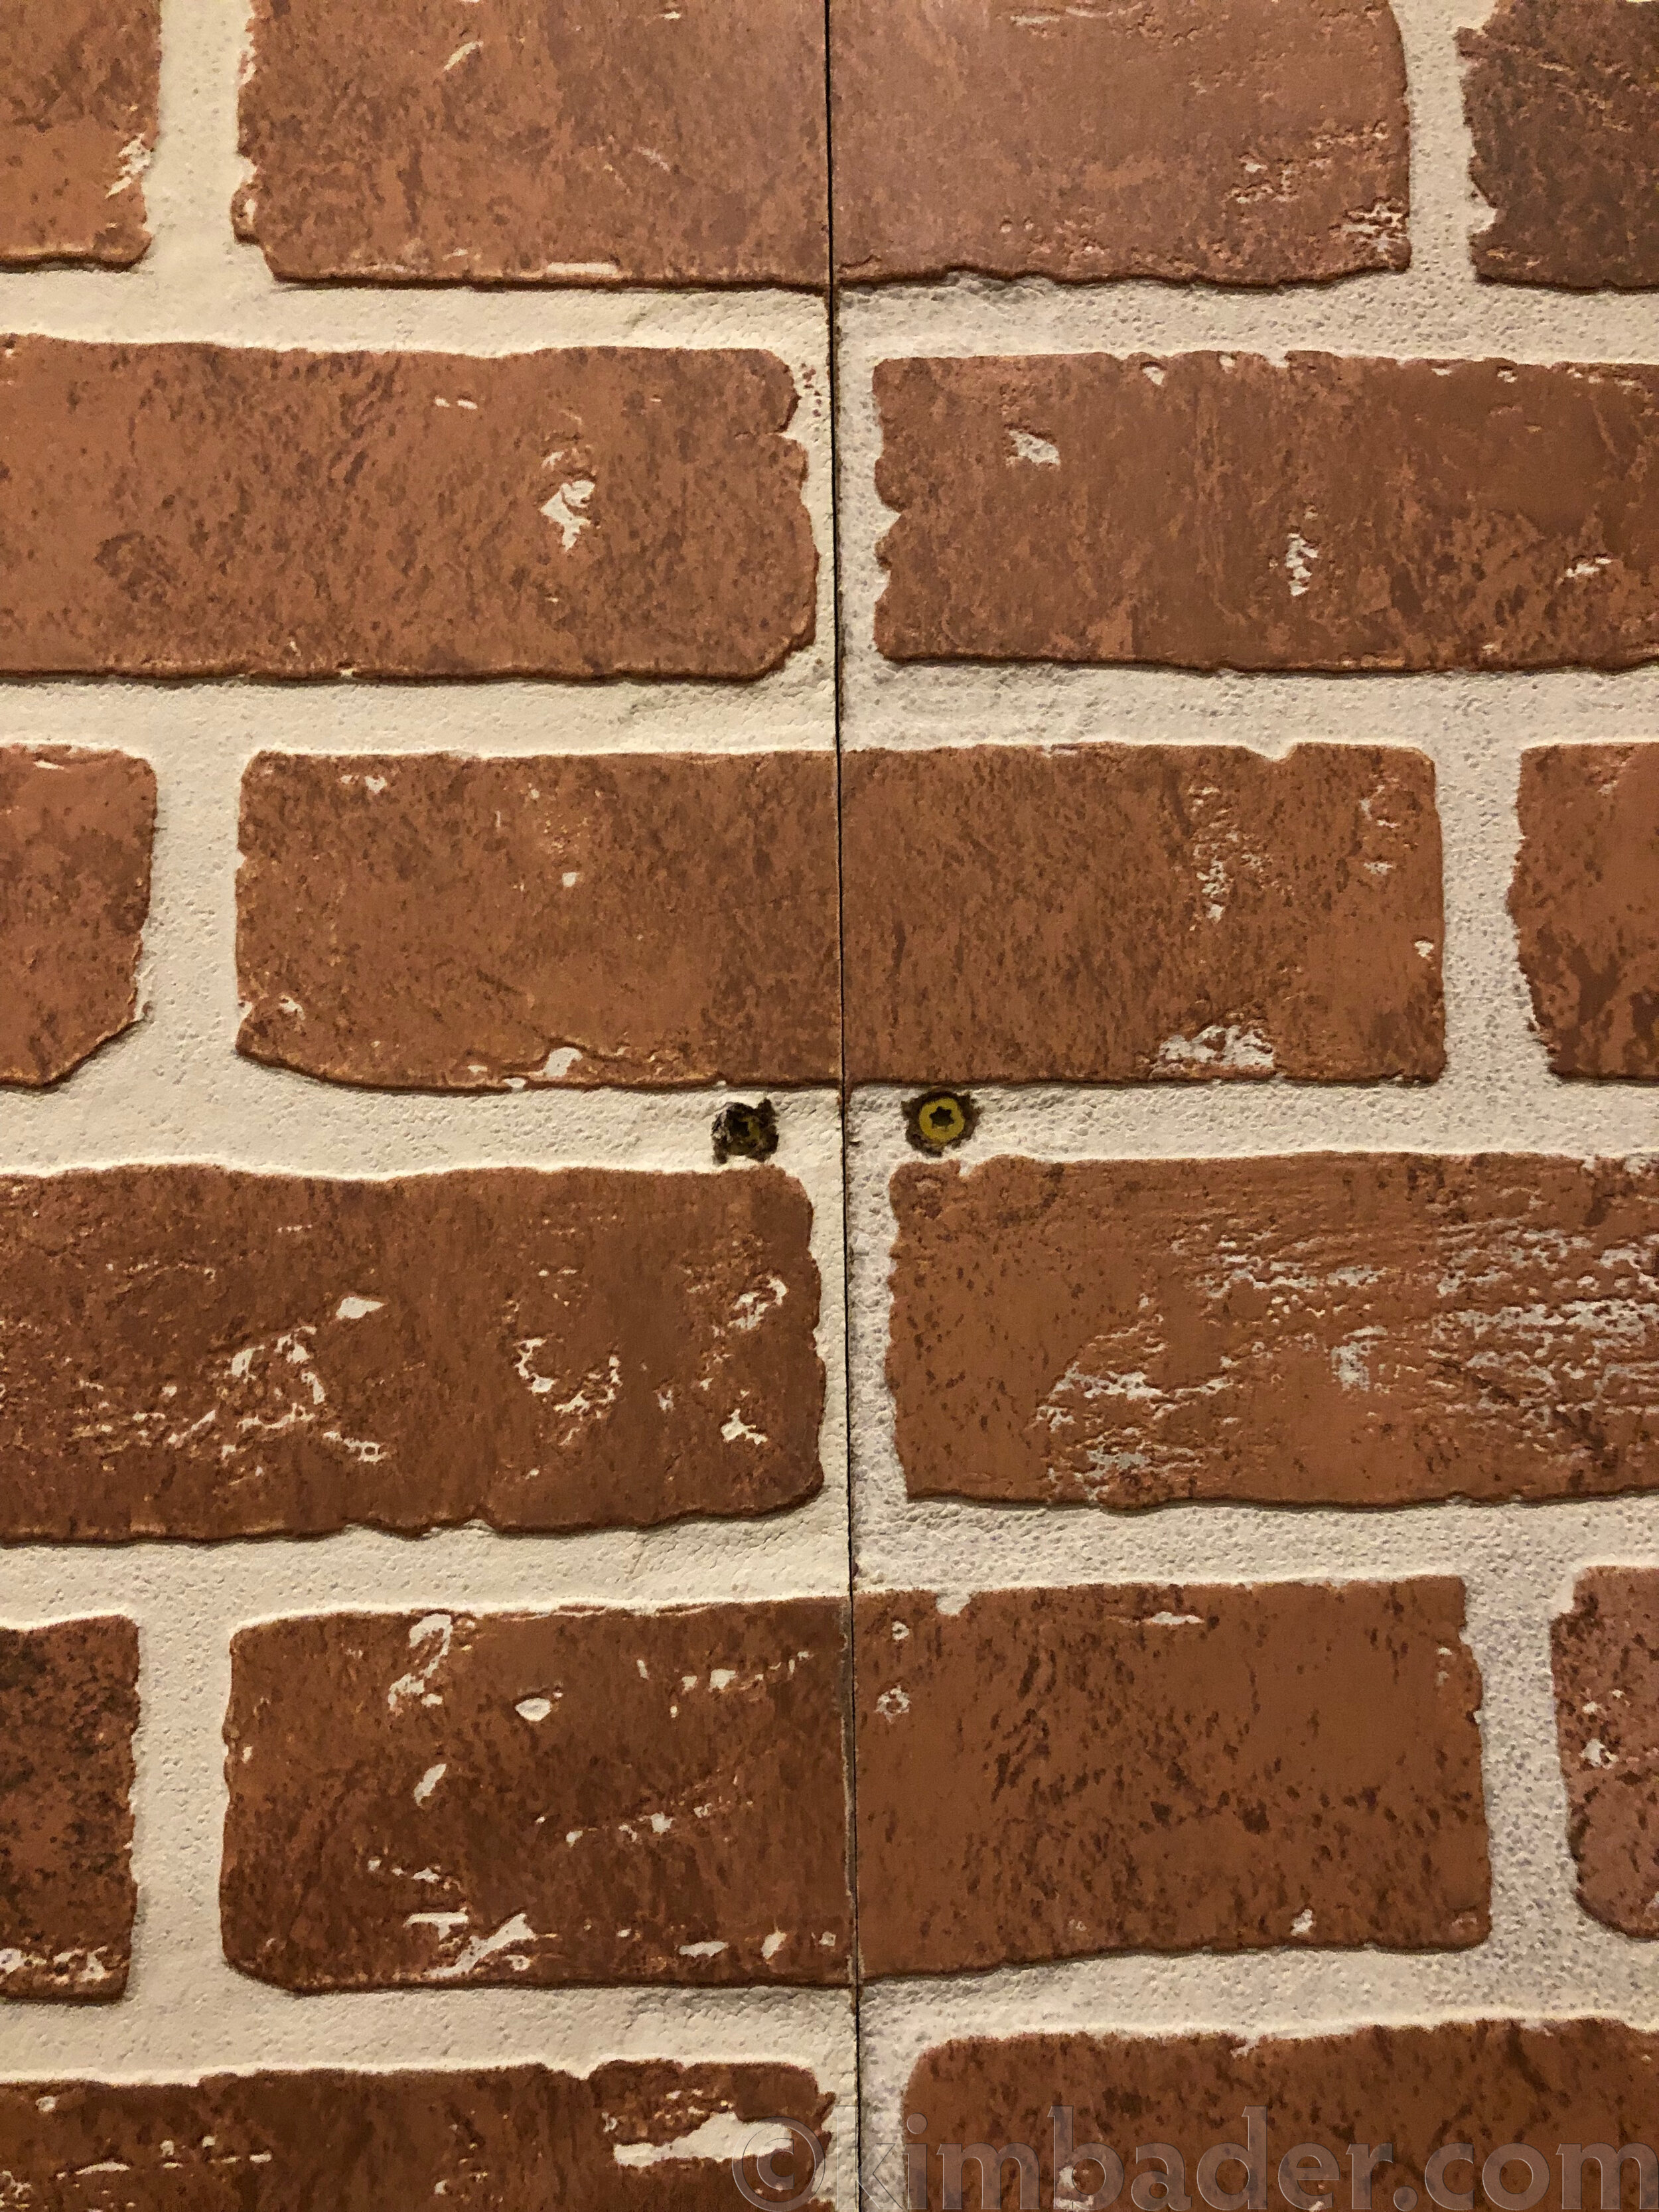
1. Level and attach your first panel.
Since I wanted to be able to remove the panels later if I got tired of it, we did not use adhesive behind the panels and used star-head screws to attach them to the wall studs. (However, I pretty much filled and concealed them so I don’t know that we’d find them if I opted to take down the panels)
You could use liquid nails or an adhesive if you are not concerned with changing it later. If I get tired of the aged brick I plan to paint it and still have the texture or put a heavy whitewash layer over it.
If we used the 4’ panels as is, the seams would have hit between the studs only giving support at the top and bottom, not in the middle of the wall. (This would not be an issue if you use an adhesive instead of screws). Instead we decided to cut the panel widths to 16”
NON-EXPERT TIP:
My dad recommended we find the studs and plan our panels from where the studs were located. Cutting the panels down to 16” wide (studs are a standard 16” apart) allowed us to hit a stud with the edges making the panels sturdier while giving a smoother transition between panels. To achieve this, we did not start with a full panel from the corner.
We did not take off the baseboards, we rested the panels on top of the trim.
We did not start in the corner, instead we started with the first 16” panel, leveled and attached it, then cut the corner piece to size.
We used a circular saw to cut the panels, you could also use a hand saw but may have rougher edges. Be sure to mark and cut on the back of the panel so you don’t scratch the finished brick side. Definitely need saw horses.


ROOKIE MISTAKE:
We have vaulted ceilings in our bedroom and where our ceiling met the wall was not level at a certain point along the wall. We didn’t realize we couldn’t take one measurement and cut straight across the top. We had to take two measurements, one for each end of the panel and cut at an angle as to not leave a huge gap. You can see it took us a bit to figure this out.
I had to add LAYERS of drywall mud to fill in the gaps and then do some fancy faux painting on the faux brick.
#2

STEP 2: The drywall mud is what gives the texture to the bricks.

STEP 2: This is when you fill any gaps (such as from uneven walls or bad cuts). If it’s a deep gap, you’ll need to do several layers of mud with each layer drying completely between application.
2. Splotchy drywall mud.
Once the panels are attached, randomly smear drywall mud on the panels with a putty knife (about 3” wide). I tried not to fill the mortar lines too much but did try to fill the seams.
Lightly sand any edges that are too sharp with fine sandpaper after the mud has dried. You want to keep the texture.
#3

STEP 3: We ended up with a HUGE gap next to the trim from our cut being off so I had to do some “creative” painting to create the look of bricks. You can really tell in this photo but adding the mortar helped hide imperfections.

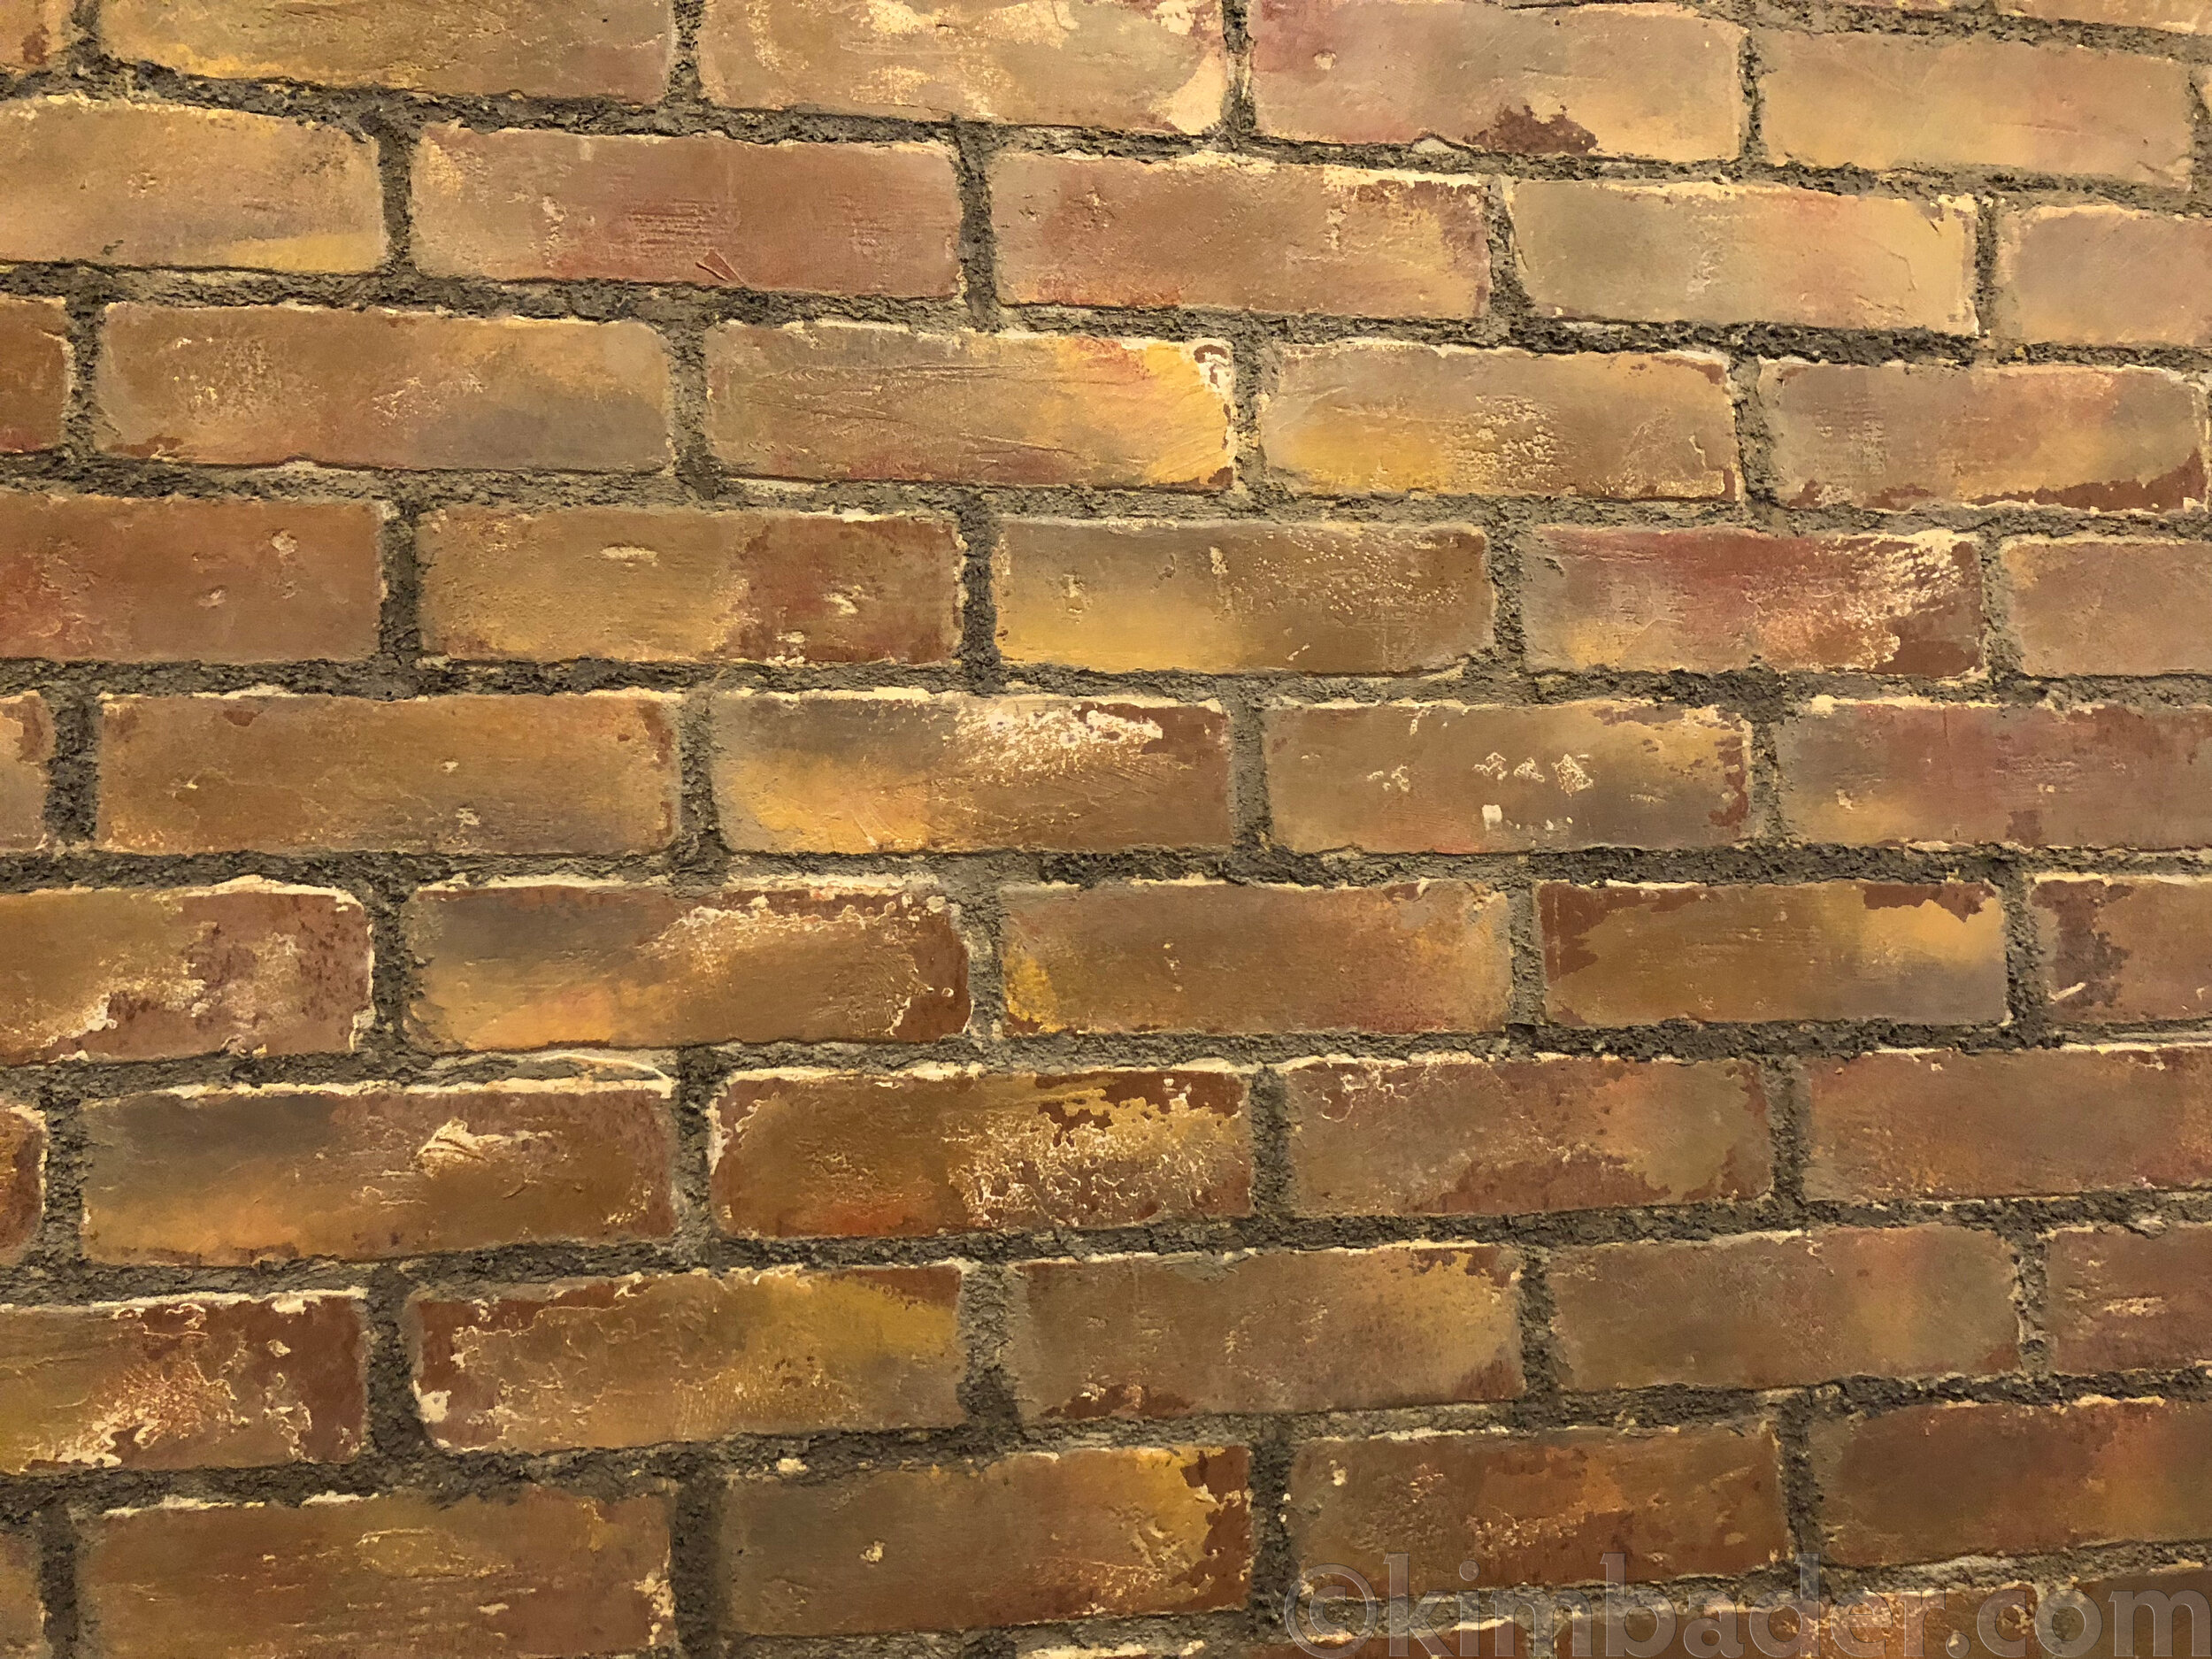
STEP 3: This close up is after the mortar but shows the texture from Step 2 and the variance in paint colors in Step 3.
3. Paint stamping
Create a paint palette of a variety of color paints. I used samples I had bought and not used and leftovers from rooms I’ve painted. I used an old pan to put various pools of the different colors.
Cut the orange sponge in half to use it as a stamp. Lightly dip the sponge in the paint collage getting an assortment of colors on the sponge to stamp on the bricks.
Sparse out your stamped bricks so they don’t have the same color pattern. When you refill your paint collage, use a different quantity of each color and arrangement of the paint colors.
This is where I wish I’d used more drywall mud or thicker spots because I think those bricks turned out the best.
This stage would be an opportunity to add more if you’d like and then blend it in with the paint.
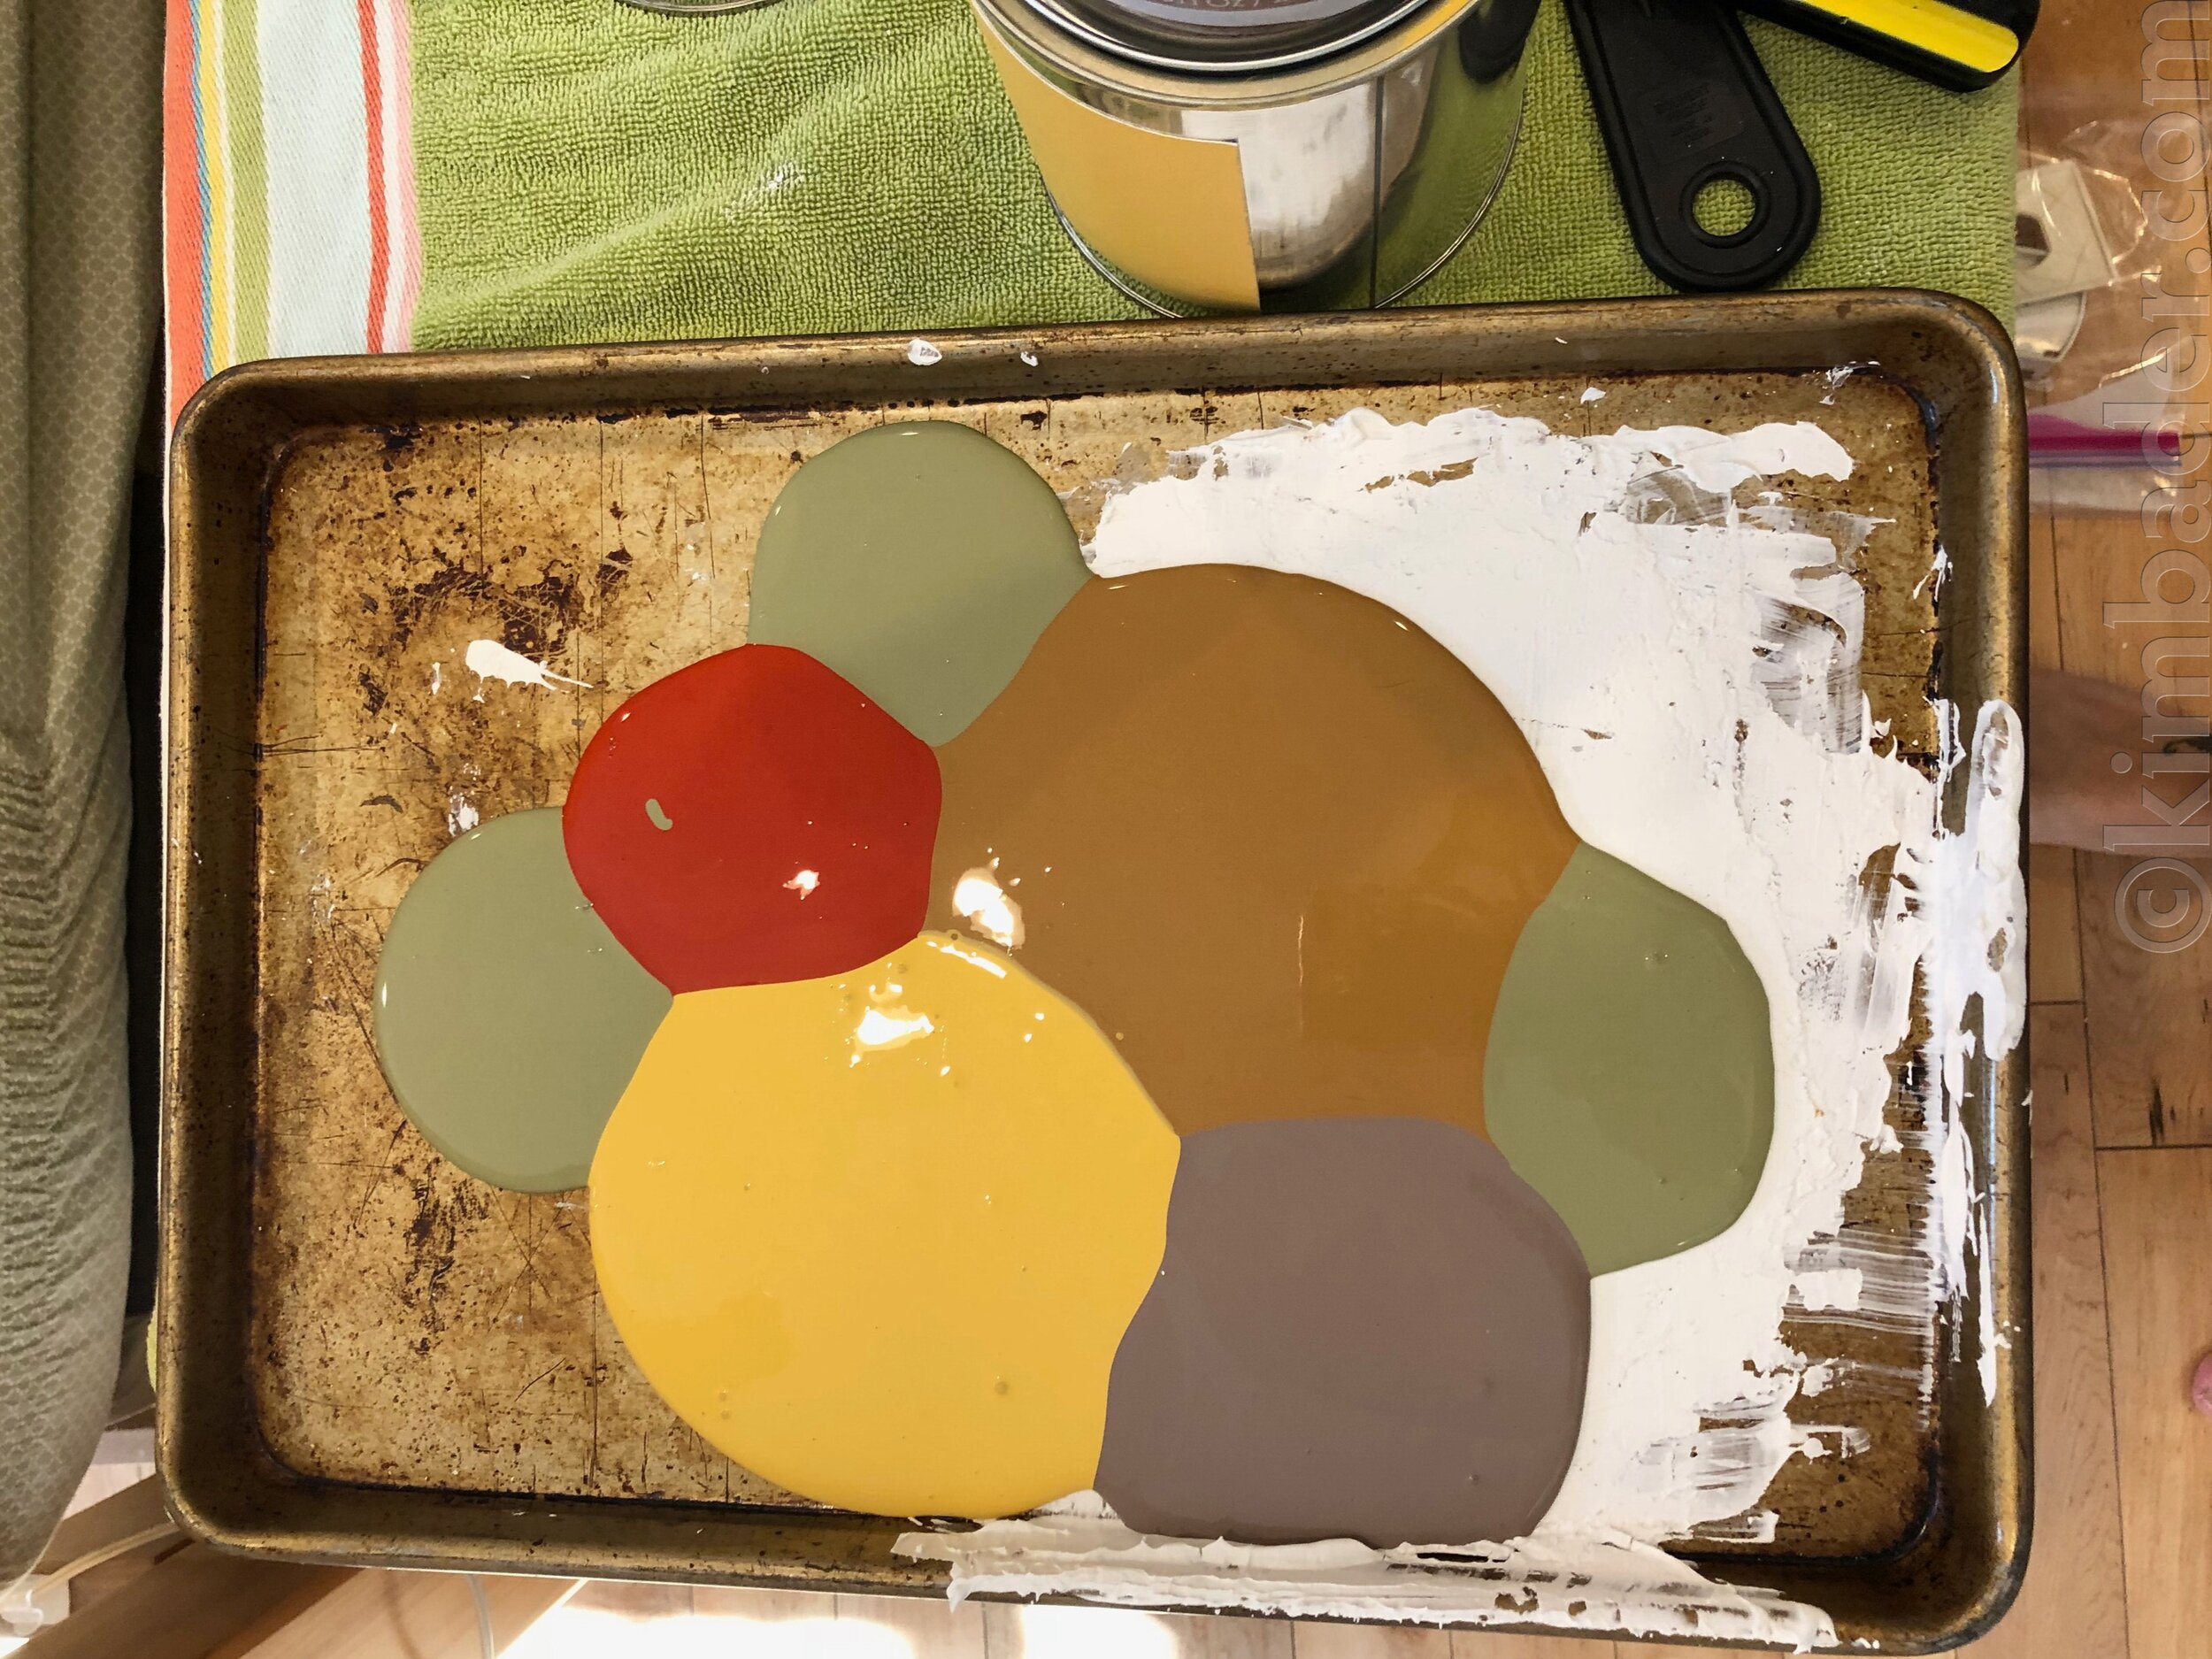
STEP 3: Use leftover paint or paint samples from the hardware store to create a palette for stamping.

STEP 3: Cut the grouting sponges in half to create a brick “stamp”.
#4

(OPTIONAL) STEP 4: The mortar dries a little lighter and gets lighter after you whitewash. You could whitewash and then mortar if you wanted it to remain dark.
(OPTIONAL) STEP 4: You can really see the difference the mortar makes here as it’s only on the middle part of the wall. You’ll definitely want to cover the floors for this step, it gets messy.
4. Optional - add “mortar”
I think the concrete caulk I used in the mortar lines is really what made the wall come to life. It was SUPER MESSY!! A lot of it will end up on the floor because it doesn’t stick very well. I wore dish gloves and spread the mortar around the bricks with my finger.
ROOKIE MISTAKE:
Rookie Mistake: In hindsight I would use a 1-2” putty knife. Just squirt some of the mortar onto a surface and use a putty knife to spread it along the mortar lines and then “fine-tune” it with my finger.

#5

BEFORE: The panels before the techniques in Steps 2-5.
STEP 5: You can re-sand a couple spots before whitewashing if you want to add more texture. The “bricks” in the center and bottom show the effect of having more drywall mud.
5. White washing
Husband liked it the way it was when I finished the stamping but I had planned to white wash it to mute and age the layers of colors. It was too vivid without the white wash balancing the colors.
Water down a shade of white paint, but not too watery to where it drips. Use a brush or sponge or I used a rag to rub on the white wash. Test a low area first, I tested where the bed would be near the baseboard.
NON-EXPERT TIP:
I did the mortar first, then the white wash. Since the mortar is so textured, it made it hard to whitewash and I was thinking I should’ve added the mortar after white washing. However, I think the mortar would’ve been too dark without the white washing, it helped age it to match the bricks.
You may want to seal the wall with something if it is in an active area or near the kitchen. I didn’t seal my wall with anything, being in my master bedroom I wasn’t worried about splashes or handprints on the wall.

Other Options -
Attaching the panels: Instead of cutting the panels to match the spacing of the studs, you could adhere the panels to the wall with liquid nails. You would still need to cut the panel height to fit your wall and cut a panel to fit the ending width.
Cutting the panels: You could use a utility knife to deeply score the panels, then break them at the score instead of using a circular saw. I recently purchased an oscillating tool at Harbor Freight that I think would also cut the panels and is easy to use if uncomfortable with a large power tool. It was less than $15 with a coupon.
Skip painting the bricks: You could skip this step if you do not want an “aged” look, although, it does add character and dimension. You could also play around with different colors until you get the look you’re trying to achieve.
Skip the concrete mortar repair: You could easily skip this step but it does really make the bricks pop and is likely what fools people into thinking it is a real, exposed exterior wall. I did not find this technique online when researching how to create the wall, there may be other options to achieve a similar effect.
Skip the white wash: I did this step to mute the saturation of color from the aging of the brick with paint. If you opt not to “paint-stamp” the brick, you could easily skip this step.